
Installation of snow guards on the roof: how to choose, calculate and install them yourself
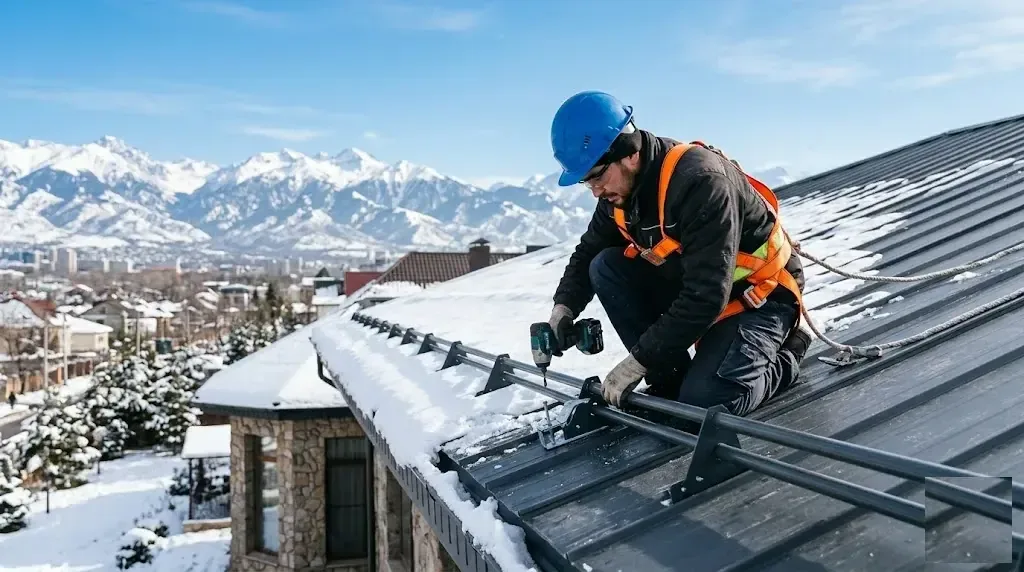
Installing snow guards on the roof prevents avalanching snow and protects people, the facade and gutters. The choice of type depends on the roofing material and the snow load. Tubular systems are suitable for metal roof tiles and corrugated sheet, while corner types are for roofs with a low pitch. The main installation rule is fixing into the batten through the roof with mandatory sealing.
Why snow guards are needed on the roof and when their installation is mandatory
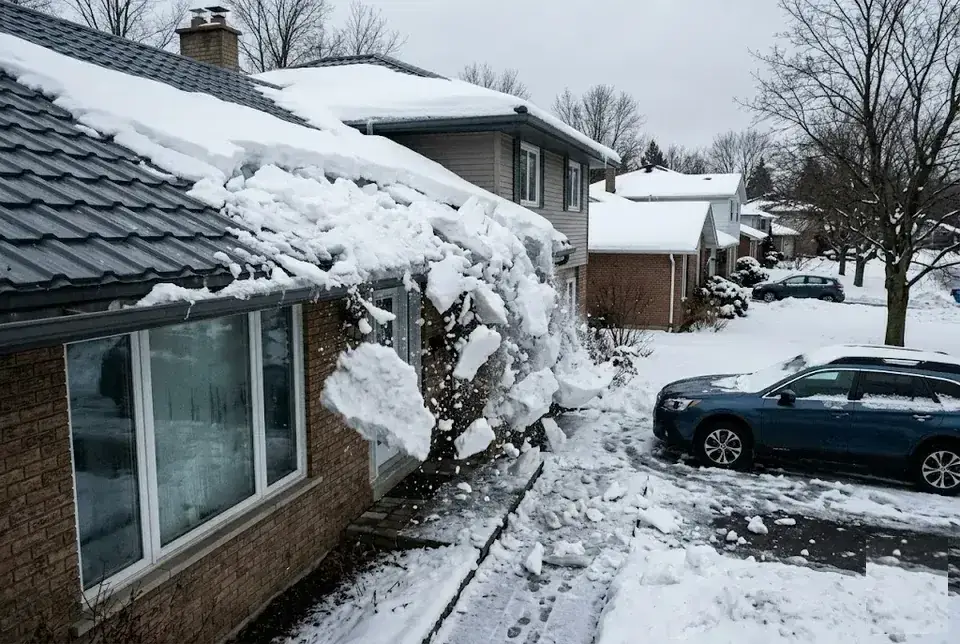
Snow guards on the roof save people, cars and the roofing itself from avalanching snow — in Almaty with its elevation changes and snowy winters this is not an option but a necessity. We examine why uncontrolled sliding is dangerous, what the law says and on which slopes protection is mandatory.
What is an avalanche snow slide and why is it dangerous
An avalanche of snow is a sudden collapse of a snow mass from a roof, which occurs when the friction force between the snow and the roof becomes less than the weight of the snow layer. On smooth coverings such as metal roof tiles or corrugated sheet, the coefficient of friction is minimal — during a thaw or strong wind the layer breaks away within seconds. The speed of such an avalanche reaches 30–40 km/h, and the mass on a slope 6 metres long is several hundred kilogrammes, comparable to a concrete slab falling. In Almaty practice there are known cases where a snow slide tore off air-conditioner brackets, broke fences and deformed gutters — the repairs cost more than installing the protection. At the same time, the absence of seals at the fixing points of snow guards leads to leaks and corrosion of the roof, so installation must be watertight. If the snow guards are not designed for the real load, the whole structure may be torn off — then the snow comes down together with the fragments of the fixings, which multiplies the damage many times over.
Are snow guards required by law
According to SP 17.13330 “Roofs”, snow guards are mandatory on all buildings with an eaves height of more than 6 metres and on roofs with a pitch of more than 15 degrees — this applies to both private houses and multi-storey buildings. The snow load is calculated using the snow region map from SP 20.13330: for Almaty and the foothills of the Trans-Ili Alatau these are regions III–IV with a standard load of 150–200 kg/m², which requires reinforced fastenings. Even if your house is lower than 6 metres, installing snow guards is your responsibility towards pedestrians and parked cars: if snow slides off, the building owner will have to compensate for the damage. In Kazakhstani case law there are precedents where cottage owners were ordered to pay for repairs to damaged cars — the amounts reached 1–2 million KZT. So it is better to install protection at the roofing stage than to pay for someone else's repairs after the very first snowfall.
Should snow guards be installed across the entire roof or only above the entrance
Snow guards must be installed along the entire length of the slope, not just above the entrance, otherwise snow will slide off the unprotected sections and damage the protected ones. The first row is mounted at a distance of 500–800 mm from the roof edge — this is the standard for all types of roofing, including metal roof tiles and corrugated sheet. Where the slope is up to 5,4 metres long, one row is enough; for greater lengths a second row is added at a spacing of 3–4 metres. Partial installation creates a false sense of safety: snow held back on one section accumulates and slides off the neighbouring one as an avalanche, unpredictably changing its fall trajectory. In Almaty houses with asymmetric roofs, such an imbalanced load often deforms the rafter system — repairing the trusses costs several times more than a complete set of snow guards.
Which roofs especially need snow guards
Snow guards are primarily needed on roofs with a smooth surface (metal tiles, corrugated sheeting, standing seam roofing) and a pitch of more than 15 degrees — on such surfaces snow slides with almost no friction at the first light thaw. A tubular snow guard is the best choice for metal tiles and corrugated sheeting: it lets snow through in portions without creating excessive load on the roof. On rough surfaces (soft shingles, slate) snow holds better, but during thaws and subsequent frosts ice forms, which still slides — snow guards are needed on such roofs too. For example, on the soft roofing of Almaty townhouses with a pitch of 20 degrees, up to 30–40 cm of ice builds up over the winter, and when it slides off it tears away the flexible shingles together with the underlayment. On standing seam roofs, an additional danger is that the sheets are joined with clips — dislodged snow can rip out an entire section, leaving the roof open to rain.
Types of snow guards and which roofing they suit
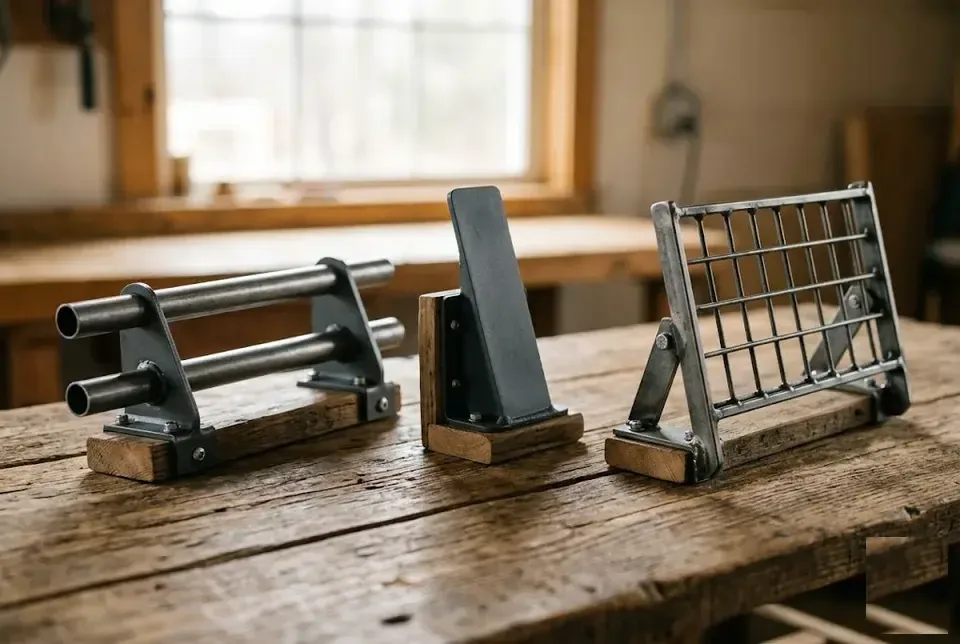
Snow guards for metal roof tiles are a frequent question, so let us look at it in detail. We examine the four main types of snow guards, their design, effectiveness and compatibility with different roofing materials — from metal roof tiles to soft roofing.
Tubular snow guard — a universal solution for most roofs
A tubular snow guard consists of two galvanised pipes 40×20 mm and brackets at a spacing of 600–900 mm. The design cuts the snow layer into safe portions — the snow slides off gradually without creating an avalanche, and the load is distributed along the entire mounting line. The brackets are fixed to the batten with screws fitted with an EPDM washer, which seals the hole and prevents leaks. Such systems withstand loads of up to 560 kg/m² and are compatible with metal roof tiles, corrugated sheet and seam roofing. When installing on metal roof tiles it is important for the screw to hit the centre of the batten board — a displacement of 10 mm reduces the load-bearing capacity of the bracket by 30%, and during a thaw the fastening may be torn out.
Comparison of four types of snow guards
| Type | Design | Max. snow load | Compatibility with the roofing | Installation specifics |
|---|---|---|---|---|
| Tubular | Two pipes 40×20 mm on brackets | Up to 560 kg/m² | Metal roof tiles, corrugated sheeting, standing seam roofing | Fastening into the batten through the roofing |
| Angle-type | Metal strip with holes | Up to 180 kg/m² | Metal roof tiles, corrugated sheeting | Fastening into the roof corrugation |
| Mesh type | Solid mesh panel | Up to 560 kg/m² | All types of roofing | Requires reinforced fastening |
| Clamp (hook) | Point element | Up to 100 kg/m² | Soft roofing, Onduline | Fastened into the batten, point-mounted |
The choice depends on the snow load, roof type and budget. Angle-type models work only on roofs with a pitch of up to 30 degrees and a load of up to 180 kg/m², whereas tubular and grid models handle any load. Clamp-on types are the weakest option, used only as additional insurance on soft roofing or ondulin.
Which snow guards are suitable for metal roof tiles
Tubular snow guards are optimal for metal roof tiles — they distribute the load evenly and do not damage the polymer coating. The tubes are positioned parallel to the eaves, snow passes between them and rolls off in small portions without scratching the zinc layer. Angle guards perform worse on metal roof tiles: because of the profiled surface, snow packs under the bar and still slides off, and the bar itself deforms under load. Mesh systems can be installed on metal roof tiles, but they retain 100% of snow, creating excessive pressure on the fixings. On metal roof tiles with a wave height of 40–45 mm, use brackets with a support plate of at least 150 mm — short plates do not reach the battening and the fixing holds only on the sheet.
Snow guards for soft roofing and corrugated sheeting
On soft roofing, snow guards are installed via eye bolts (point hooks) or brackets with an enlarged support area, so as not to damage the bitumen covering. The eye bolts are fixed into the battening through the layer of shingles with a spacing of 500–700 mm in a staggered pattern — this way the load is distributed evenly. For corrugated sheet, the same tubular systems as for metal roof tiles are suitable, but adjusted for the wave height: for a high profile (H75, H114) brackets with an elongated support plate are needed — standard 120--millimetre ones do not reach the battening. On soft roofing it is better to install the eye bolts before laying the top layer of shingles: this way the fixing point is additionally sealed by fusing bitumen, and the risk of leaks is reduced to zero.
How to calculate the number of snow guards and determine the layout of the rows

To keep the roof from leaking after the very first winter, the number of snow guard rows and the spacing between brackets must be calculated for the specific slope — not by eye. We break down three key parameters and an example for a roof of 8 metres.
What determines the number of rows of snow guards
The number of rows of snow guards depends on the slope length and the snow load: for a length of up to 5,4 metres one row is sufficient, from 5,4 to 10,8 metres — two, more than 10,8 metres — three. This gradation is based on the snow load calculation according to SP 20.13330, where each linear metre of slope carries a snow weight of 0,5 to 2,5 kN/m² depending on the snow region (for Almaty this is region III, 1,2 kN/m²). For a slope 6 metres long with an angle of 30°, the load on the lower edge reaches 720 kg — one row of snow guards with a bracket spacing of 900 mm withstands about 300-400 kg per point, which gives a margin only with two rows. This rule works for the middle belt (snow regions III-IV). For regions I-II (southern regions) the number of rows can be reduced, for V-VI (northern) — increased by one row at the same slope length.
What bracket spacing is considered correct
The standard spacing between snow guard brackets is 600-900 mm, with the optimum value being 700 mm for most types of roofing. A spacing of 700 mm gives an even distribution of load: with a slope length of 8 metres, one row uses 12 brackets (8000 / 700 + 1), each taking on around 80-100 kg of snow in region III. A spacing of 900 mm reduces the number of fixing points by 30% but lowers the safety margin — when wet snow with a density of 300 kg/m³ sticks, the load on the outermost bracket may exceed 200 kg, risking the screw being torn out of the batten. Reducing the spacing to 500 mm is justified only under very high snow loads (regions V-VI) or on roofs with a pitch of more than 45 degrees — in other cases it is excessive and increases the number of potential leak points.
At what distance from the roof edge should the first row be installed
The first row of snow guards is installed at a distance of 500-800 mm from the roof edge (eaves overhang) — this is the optimal range for most roof types. Attachment to the eaves matters: if you step back less than 500 mm, the snow guard ends up too close to the eaves flashing, where the batten is thinner (usually a 25×100 mm board instead of 50×100 mm on the slope) and fastening into it holds 40% weaker. On metal roof tiles with a wave pitch of 350 mm it is convenient to measure across two waves — that gives exactly 700 mm from the eaves edge to the centre of the tube. If snow guards are installed closer than 500 mm to the edge, snow will overhang the eaves and form icicles; if further than 800 mm, too much snow mass will remain behind the barrier and may break it through.
Example calculation for a roof 8 metres long with an angle of 30 degrees
For a roof with a slope length of 8 metres and an angle of 30 degrees in snow region III, two rows of tubular snow guards will be required with a spacing of 700 mm between brackets. We mount the first row at a distance of 700 mm from the eaves overhang — this is the second wave of the metal roof tile, where the battening is reinforced. We place the second row higher, at a distance of 2,5-3 metres from the first: with a slope length of 8 metres and two rows, the load is distributed so that the lower row holds 60% of snow and the upper row holds 40%, and each bracket works within the design limit of 100 kg. One row will require 12 brackets (8000 / 700 + 1), two rows — 24 brackets, each fixed into the battening with a 4,8×28 mm screw with an EPDM rubber gasket. Each bracket is a potential leak point, so sealing is critically important: before tightening the screw, apply silicone sealant to the gasket, otherwise after 2-3 seasons the rubber will lose its elasticity and develop a microcrack.
How to install a snow guard — step-by-step instructions for different coverings
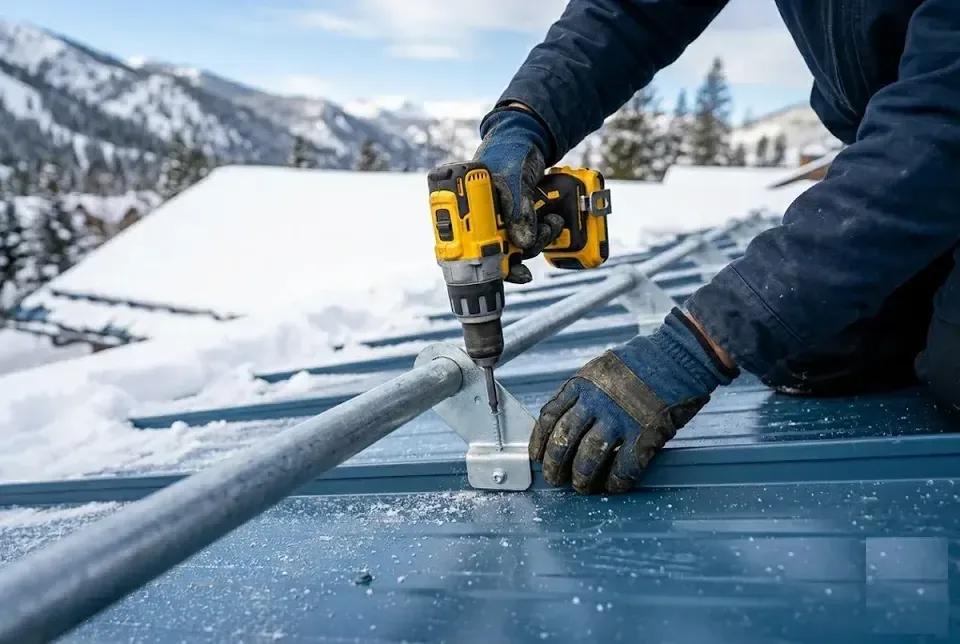
Installation of snow guards on metal roof tiles, corrugated sheet and soft roofing consists of four stages: marking, drilling, fixing the brackets and securing the tubes or angles. Let us go through each step.
Tools and materials for installing snow guards
- Cordless screwdriver: choose a model with torque adjustment — so as not to overtighten the screw and crush the EPDM gasket.
- Metal drill bit 6-8 mm: used to make a hole in the metal roof tiles or corrugated sheet before driving in the screw, so as not to strip the thread.
- Marking cord and spirit level: the stretched cord sets the horizontal line, while the level checks the height difference between the outermost points of the row.
- Roofing screw with an EPDM washer 5,5×25 mm: only this size passes through the metal and enters the batten by 20-25 mm — enough for reliable fixing.
- Tin snips and sealant: the snips cut the snow guard tubes to length, the sealant fills the gap between the bracket and the roof if the sheet profile is uneven.
- Bitumen mastic (for soft roofing): ordinary silicone sealant is incompatible with bitumen materials — use only bitumen mastic or a special sealing tape for the fastening points.
Marking the installation line and preparation
Marking the line begins with an offset of 500-800 mm from the eaves overhang — a marking cord is stretched along this line to check horizontality. The cord is fixed to the outermost brackets or temporarily screwed to the roof: where the slope is longer than 6 metres, intermediate beacons are placed every 2-3 metres so that the cord does not sag. It is convenient to mark using a laser or water level: the height difference between the outermost points of the line must not exceed 10 mm over 10 metres of slope, otherwise the snow guards will work unevenly. Before marking, make sure that the batten runs beneath the bracket mounting points — to check this, tap the roof or use a magnetic stud finder: metal over a void sounds ringing, over timber it sounds dull.
Fastening brackets to metal roof tiles and corrugated sheeting
The bracket is fixed into the battening through the roof: the drill passes through the metal roof tile and rests against the wooden battening, then a 5,5×25 mm screw with an EPDM gasket is driven in. On metal roof tiles the bracket is placed strictly in the lower wave — this way the screw enters the battening and the gasket fits tightly against the metal without a gap. On corrugated sheet the bracket is fixed in the upper crest of the wave, but a sealing pad must be used: between the crest and the bracket plate there remains an air gap of 15-20 mm, which without a pad will let water through. It is important to hit exactly the battening and not the air between the boards — for this you need to know the battening spacing in advance (usually 350 mm for metal roof tiles) and mark the fixing points taking this spacing into account.
Installation of snow guards on soft roofing
On soft roofing, snow guards are installed using eye bolts (point hooks) or special brackets with a wide support plate, which are fixed into the battening through the bitumen covering. An eye bolt is an L-shaped hook with a flat base of 80×80 mm: it is screwed to the plywood or OSB board of the continuous base, and on top it is covered by an overlap of soft tile shingles. Brackets with a wide plate (120×120 mm) are placed on an already finished covering — the plate is screwed with four wood screws at the corners, then the perimeter is sealed. The fixing point on soft roofing must be sealed with bitumen mastic or a special tape — silicone sealant is not suitable here, as bitumen materials are incompatible with silicone and peel off over time.
Can snow guards be installed on an already finished roof
Yes, snow guards can be fitted to an already finished roof without dismantling the roofing — all work is done from above, through the roofing, fastening into the existing batten. The technology is the same: marking from the eaves, drilling, driving screws into the batten through the metal or bitumen. The only difficulty is finding the batten blindly: on metal tiles it runs through the wave (spacing 350 mm), on corrugated sheeting the spacing may be 400-500 mm, and on soft roofing the base is continuous — there you cannot miss. The only limitation is that if insulation and a vapour barrier are laid under the roofing, you must be especially careful when drilling so as not to damage the vapour barrier film, otherwise moisture will condense at the fastening point: before drilling, fold back the insulation in the attic and check whether the film is stretched directly under the roofing.
Common mistakes in snow guard installation and their consequences
We examine the five most common mistakes when installing snow guards, which lead to leaks, deformation and system failure.
Fastening not into the batten — the main cause of snow guard failure
If a bracket is fixed only into the metal roof tile sheet or corrugated sheet and not into the battening, the snow guard cannot withstand the load and is torn off together with part of the roof. The thin metal of the roof covering (0,4–0,5 mm) simply cannot hold the weight of the snow mass, especially on the long slopes of Almaty houses with an angle of 30–45°. The bracket tears out the sheet, and the owner ends up not only with a deformed roof but also with an open hole through which water flows in. In our practice there was a case where a client from the Kok-Tobe district lost three brackets at once after the very first snowfall — all the screws were holding only in the profiled sheet. You can check whether a screw has gone into the battening by the tightening effort: if the screw turns in easily and “falls through”, it is not in the wood; correct fixing is felt by increasing resistance and a characteristic creak.
Lack of sealing — a path to leaks and corrosion
Every hole in the roof is a potential source of leakage, so sealing is mandatory: a seal is installed under the bracket, and the drilling point is additionally treated with roofing sealant. On metal roof tiles with a wave of 25–40 mm, the rubber seal (EPDM) fills the gap between the bracket and the profile, preventing water from flowing under the fixing. Without it, even a correctly tightened screw leaves a gap — especially on the side waves, where the gasket meets the metal at an angle. In an Almaty winter with frequent thaws and freezes, water in microcracks expands, enlarging the hole, and after 2–3 seasons rust appears around the fixing. Even a quality screw with an EPDM gasket does not guarantee 100% of sealing on a profiled roof — because of the uneven wave, the gasket may not fit tightly, so a seal under the bracket is mandatory.
Spacing between brackets too wide
With a spacing between brackets of more than 900 mm, the snow guard tubes sag under the weight of snow, and the brackets experience increased load, which leads to deformation of the system. The optimal spacing for tubular models on metal roof tiles is 600–700 mm, on corrugated sheeting — 700–900 mm depending on the tube thickness (usually 25–32 mm). If brackets are placed every 1,2 metres to save on fasteners, on a slope 8 metres long the snow load of 300–400 kg per linear metre will bend the tube in the middle. Even a sag of 5–10 mm reduces the effectiveness of snow retention: snow starts seeping between the tube and the roof, and the system stops working as a barrier.
Use of unsuitable screws and absence of seals
Only roofing screws with an EPDM washer and zinc coating are used to fix snow guards — ordinary wood screws rust and destroy the roof at the fixing point. A roofing screw has a drill point at the end, which passes through the metal without pre-drilling, and a bonded washer with a rubber gasket that seals the hole. A galvanised screw without EPDM (for example, for plasterboard) after 1–2 winters in Almaty's humid conditions becomes corroded, the gasket cracks, and water starts dripping straight into the insulation. Saving on screws is a false economy: replacing a rusted screw in a new spot creates an extra hole in the roof, while the old one remains unsealed and keeps leaking.
Tips on choosing snow guards and operating the system
For a snow retention system to work without leaks or failures, it must be correctly matched to the roof and checked once a year — here are the main rules for homeowners.
How to choose snow guards for your roof
Three parameters are taken into account when choosing such structures: the type of roofing, the snow load and the pitch angle — tubular systems are suitable in 90% of cases. For metal tiles with a wave spacing of 350 mm, a tubular snow guard with brackets designed for that profile is used — universal fastenings do not work because of the difference in wave height (25-60 mm). The grid version is effective at loads above 240 kg/m², but for the Almaty region with its standard of 160-180 kg/m² it is excessive — the tubes hold back 70-80% of snow without overloading. Angle-type models made of 1,5-2 mm galvanised steel are fitted to standing seam roofing and corrugated sheeting with a wave of up to 20 mm, but on standard metal tiles they fit worse — gaps remain between the angle and the sheet. Angle-type snow guards are a budget solution for southern regions with low snow load, but on profiled metal tiles they are inferior to tubular ones, so for slopes longer than 6 metres only tubes are preferable.
How to check correct installation after mounting
- Tightening the brackets: check that each bracket is tightened without play — the screw must enter the battening board by 30+ mm, not get stuck in the insulation.
- Tightness of the seals: inspect the rubber gasket under the bracket base — it must fit snugly against the metal tile with no gaps, otherwise water will seep through the hole.
- Spacing between brackets: measure the distance between adjacent supports — it should be 600-900 mm; with a larger spacing the pipes will sag under the weight of snow.
- Levelness: place a spirit level against the tubes — a deviation of more than 5 mm over 2 metres of slope length means the brackets are mounted at different heights.
- Strength test: pull on the pipe by hand — the system should not wobble; if there is play, the screw has not entered the batten or is not tightened enough.
Maintenance of snow guards during operation
Snow guards require no special maintenance, but once a year (in spring) inspect the mounting points for corrosion and check that the seals are watertight. After the snow melts, dirt and leaves accumulate on the brackets — remove them with a soft brush so as not to scratch the zinc coating. Where the seal has cracked from ultraviolet light (usually after 2-3 seasons at frosts below -20°C), it is replaced — the absence of seals leads to leaks and corrosion of the roof around the holes. On slopes with a pitch of more than 45 degrees such systems experience increased loads — they are inspected twice a year: after winter and before the snow season begins. If a red deposit appears at the joints between the pipes and the brackets, this is a reason to replace the part — galvanising of 275 g/m² lasts 10-15 years, but corrosion begins earlier at cut edges and welded seams, especially near exhaust flues carrying hot air.
Conclusion
We have gathered the essentials you need to know about snow guards: from choosing the type to the rules of installation and maintenance. Here are the key points for those who want to make a safe roof with their own hands.
Key takeaways
- Snow guards are not an option but a necessity for any pitched roof in regions with snowy winters. They prevent avalanching snow and protect gutters, the facade and, most importantly, people's health.
- The choice of type (tubular, angle-type, grid) depends on the roofing material and snow load. For metal tiles and corrugated sheeting, tubular systems are optimal — they are reliable and do not trap debris.
- Correct calculation of the quantity and installation spacing is the key to effectiveness. Base your work on the requirements of SP 17.13330 and the roof geometry: the greater the pitch and the length of the slope, the more rows of snow guards will be required.
- Installation must be carried out strictly into the battening through seals. Mistakes at this stage (fixing only into the profiled sheet, lack of sealing) lead to leaks and corrosion.
- Regular inspection of the fastenings (once a year) extends the service life of the system. It is especially important to check snow guards after winter on roofs with a pitch of more than 45 degrees.